What Are the Advantages of a Super Premium .Com Domain?
Increased Traffic
Search Engine Ranking
Brand Recognition
Immediate Presence
Higher Profits
Great Investment
#1 in Premium Domains
- 208,000 of the World's Best .Com Domains
- Available For Immediate Purchase
- Safe & Secure Transactions
- 100% Satisfaction Guaranteed
- Testimonials


24/7 Customer Support: 888-694-6735
Search For a Premium Domain
or Click Here To Get Your Own Domains AppraisedTruth in Numbers
We are constantly expanding our inventory to give you the best domains available for purchase!
Improve Your Business
Read or Listen to the Free Book!
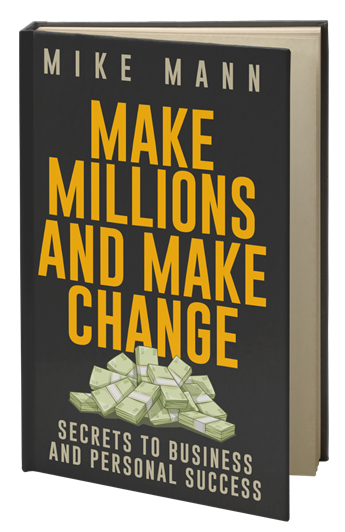
The top business book that also teaches to give back.
What's in your Domain Name?
This domain name will potentially help you bring in more customers and profits every day, as the domain itself goes up in value. A super premium .Com domain name from DomainMarket.com means instant branding, search engine, and marketing benefits. We make it safe, easy and affordable for you to own TheComfortableLife.com right away.
Click here to purchase TheComfortableLife.com
DomainMarket.com domains are carefully selected for branding excellence by the world's top domain name appraisers, so you will only find the most prized and premium assets for sale.
If the value of one new lifelong customer and its references makes up for the domain cost, imagine how a great domain from DomainMarket.com will benefit when it helps you attract multitudes of unexpected new customers (whose value far surpasses the domain value, which keeps rising). Review the Microsoft study proving this phenomenon: "Domain Bias in Web Search"
This domain is offered for sale by its owner currently at the "buy it now" price listed "BIN" Click here to purchase TheComfortableLife.com, but could be withdrawn at any time or its price potentially substantially raised. Also, once sold, the next owner, your domain competitor, would likely never re-sell it again, especially to his competitor; and would instead try to take all your customers and potential customers, year after year, to the extent possible, which you should do to them by purchasing the domain first.
You may find a Make Offer button on certain higher value domains; but beware, expressing demand in a domain or visiting a URL usually raises its price. You can buy at the current price at any time, as long as you are first, and its still being offered for sale. The issue to recognize is that the current price naturally trends upwards over time, then additionally based on traffic, expressed interest, and other apparent demand. So time is of the essence, especially right now, with prices escalating precipitously.
For serious companies and marketing executives, attracting just one new lifetime customer, business partner, or employee, leveraging a premium domain, will justify this excellent long-term investment. But in fact, your DomainMarket.com sourced super premium domain is likely to rake in many valuable new customers and opportunities in the long run that normally couldn't or wouldn’t find you. Compared to the risk and sunk costs of traditional advertising channels, or newer online advertising methods, this is clearly a huge home run. Other types of advertising are not resellable assets like domains, with long term investment opportunity; other advertising investments are all very risky comparatively, and are mostly wasted if you think about it.
First come, first served. Don't miss this once in a lifetime opportunity to be #1. The first person or company to secure TheComfortableLife.com from this site can control it forever, to the exclusion of all others. It will become out of our control. Get it first; and get ranked first in Google! All that matters online is Location Location Location! Your Domain is Your Location! and brand, and future profits; dont shortchange it obviously! You can redirect your new domain traffic to your existing internet assets until you are done with development, or indefinitely, if you prefer.
Would you really consider shortchanging your permanent global brand by skipping the perfect .Com and letting someone else dominate online forever, and potentially offline? That would be a very costly mistake for your family's future and for the other stakeholders of your entity; everyone similarly situated regrets it.
The world's best companies and smartest professionals always rely on DomainMarket.com and our super-premium, contextual .Com domains to leverage their branding opportunities. 500 out of 500 of the 'Fortune 500' corporations use .Com, and all of the world's best salespeople and marketers; they aren’t going anywhere.
Dozens of others could use your trade name or trademark in a variety of industries, but only one of you can be smart enough to control the .Com customer traffic forever. If you don't own the exact match .Com premium domain best suited for your offerings then over time your brand and site is likely to get lost in Google and in the minds of potential customers; rendered irrelevant. Plus, it would be super embarassing and costly for your customers or prospects to land on this site when they are actually looking to purchase from you instead.
Plus you may be able to profit from the consumer traffic, "eyeballs", and sell advertising space or use Google AdWords on the domain site, to your financial advantage. Our partner SEO.com are a team of world class digital marketing experts and select Google Partners. We recommend you contact them for any assistance with online advertising, marketing, SEO, PPC, landing page optimization, ecommerce, conversion optimization, web design, Facebook ads and more.
Super premium .com domain names from DomainMarket.com are the start and top of the economic food chain, in order to create the best on and offline 'unicorn' corporations. Pick the wrong domain and you deserve the consequences of your competitors rolling you. Next you need the rest of the best of modern digital marketing if you want to compete with serious players in your industry.
"Ring.com [sold for $1B] was previously called DoorBot, His tenacity, and the decision to stick with the product he originally built [but with better domain], has paid off in a big way."
Almost all decent TV ads now use premium generic .Com too, and radio ads, plus sides of trucks, billboards, bumper stickers, boats, planes, tshirts, blogs, etc. You may be one of these 'Fortune 500' mega corporations ready to dominate the world, or just a regular granny in your underwear, but either way you can look the same with TheComfortableLife.com.
DomainMarket.com is the only authorized pricing agent for this domain name, anyone else is a third party seller. Every domain price on this site is completed by top world experts from AccurateAppraisals.com.
It's critical to secure your domain today if you want to control the world class branding and recognition before your competitors who are eyeing it. They might outcompete you forever if they get it first and get all the traffic, conversions, and branding value compounded endlessly. A premium domain could easily add 20% compounding yearly to a company's bottom line profits if deployed properly, which for most companies would prevent them from going out of business.
Would you seriously consider letting someone else control your best possible name, Internet branding, and Google positioning forever if you could avoid it? You can control it right now. There is extreme marketing power behind the perfect domain to promote your products and services. Owning a popular English expression and brand online is the Holy Grail for perpetually converting lower cost new customers.
Super premium domains from our marketplace generally rise in resale value, and can be reused or resold at any price if you are ever done capitalizing on them, or if you are a domain investor. Sales prices at our market have doubled over the last few years, and likely will again due to worldwide Internet growth, prestige, the general scarcity of super premium .Com domains, historically high demand, and the failure of all competing "gTLDs". We have been in business for over 10 years and have sold more of our premium domains than any of our competitors. At our previous company (BuyDomains.com) we launched the whole online premium domain trading industry in 1998.
Waiting to purchase your favorite domain is a financial mistake, or, even worse, you may never be able to get it at all, at any price, if someone buys it first. It's much less risky to purchase a super premium domain and name your business accordingly, than any other choices; or at least redirect the free customer traffic to your site. Why would anyone choose to increase their business risks with inferior branding and domains? The ever increasing demand for internet sourced information and services, and premium domain investments is the very bandwagon you need to hop on. The trend is your friend! You may own all the tradenames, trademarks, logos, and social sites in the world, but exact match .Com possession ranking in Google is ten tenths of marketing/branding 'law'.
You need to control the keywords and keyword combination strings relevant to your company and industry, forever if possible; bidding on words and paying over and over for advertising is a considerable risk, but buying the .Com is a certainty. The perfect domain, without compromising yourself and your brand, has to come first for a serious business, in order to set yourself apart from all wannabe competitors, and create long term leverage with your other communications and potential advertising. If you pick this domain you may not need expensive, super risky advertising at all, or at least not as much.
You also need properly branded professional email if you want to appear professional and convert the highest number of customers at the highest profits. Using Gmail, Yahoo, Outlook, AOL, instead of your own properly branded email address is foolish and unprofessional and fails to add leverage to your brand, or use the leverage from your brand, which should have been professionally built from day one. But no time like the present.
Premium domains will keep going up in price due to a "flight to quality", millions of global companies, people and projects requiring great branding perpetually. Domain names lower in branding quality than the Super Premium .Com level DomainMarket.com specializes in are far too risky to be considered investments, like all the new “gTLD” domains, or very low level .Coms. They are hobbies at best and more likely just a complete waste. But the right .Com is the ideal investment and marketing vehicle for anyone with ambition.
Speaking of ambition; your boss and coworkers will love you; and you may just get a raise, if you improve the URL, email addresses and branding for everyone, forever. Anybody who might have told you that .Com domains would go away, lose value, be replaced by other domain extensions or technologies was totally wrong, or worse.
In some cases a premium domain can be effective in helping with your tax strategy too (please ask your accountant for details); or can work as an alternative asset (like Bitcoin), a way to store investment value in "the cloud" forever, that is easy, anonymous, and cheap to control and move around (ask a pro).
Each domain in our marketplace is individually valued based on a series of attributes, developed by professionals for over two decades. We are the primary dealer for every single fabulous .Com domain listed on our site. Any other legitimate sellers are secondary.
A delayed costly escrow process is not necessary to complete your transaction, as we have been the trusted dealer for tens of thousands of domain transactions and transfers, without a glitch. DomainMarket.com is the best known and most trusted competitor in the premium domain name industry. In any event, if it makes you feel even more comfortable, Escrow.com is a purchase option for large transactions.
The asking price for TheComfortableLife.com is based on a careful and professional appraisal by the world's leading experts on domain valuations, the inventors of ecommerce for premium domains. The price is explicitly certified to be fair by real experts, so the buyer can be confident in the great long-term value and investment opportunity for the unique domain asset in question.
Your competition for a great domain, and therefore your opportunity to arbitrage or capitalize, is even greater than your normal business competition, because it includes your normal competition, plus any other company or person in the world that wants to invest in domains for the future, plus anyone who competes for the same word, expression, or brand in any marketing or media.
For example if you are a lighting manufacturer competing for the domain 'BrightFuture.com' then all the educational institutions or websites in the world could become your competitor for domains, or partner potentially; or you could sell it to them at a huge profit if you are a good investor. Not to mention any religious institution would be well served with that domain.
If you’ve ever been to a competitor’s marketplace you will find predominantly random, worthless domains, at prices that were derived without any logical appraisal process. But our domain appraisals and prices are very consistent with one another, regardless whether you appreciate any particular one. Competitors collections and sites with domain names for sale are unappraised mostly, inconsistent if they are priced, and are not done by true professionals oftentimes. Conversely, DomainMarket.com's for sale inventory is highly curated and cleaned for excellence, with proper pricing.
Super-premium domain values generally range from $10,000 to $2 million. The average industry sales price is approximately $30,000. Our marketplace also has thousands of “close out” domains, at even lower prices!
Building a fabulous online presence starts with a top-quality domain name from DomainMarket.com. Here, you'll find only the very best .Com domain names waiting to be developed into first-rate profitable brands.
Domains are valued based on many factors such as marketability and brand-ability, the industry it is related to, similar domain sales, acquisition cost and, if applicable, the website traffic and associated revenue they can drive. A strong domain is one of the best investments you can make in your business, and can pay for itself many times over.
Exact match domains from DomainMarket.com dramatically reduce the amount companies pay per click by improving their Quality Scores, the measure by which Google determines a keyword's relevance and cost. Your domain's Quality Score depends on alignment between the paid keyword, ad copy and landing page or website. The more a search query appears in an ad, including in the domain name/display URL, the more relevant the ad appears to the searcher.
We are also search engine optimization (SEO) experts, and own SEO.com Inc. corporation with 40 employees. Let us know if you need help getting paid or organic traffic; help in getting to the top of Google.
Buy TheComfortableLife.com now!
Buy NowWhy TheComfortableLife.com?
Great brand recognition and memorability from advertising, marketing, and your web site landing pages.
This domain is likely to hold and increase its value over time. Poor domain names lose traffic and new customer conversions to better domain named companies, Microsoft Research calls this effect "domain bias in web search." TheComfortableLife.com is a category killer domain that may be commonly used around the world. Such a name offers your company a clear competitive advantage online and off.
TheComfortableLife.com is relatively easy to spell / highly memorable. Trust and recognition from such a great name drives higher click through rates. Only one person or entity can have it and utilize it online and offline for marketing and advertising (and maintain all future resale rights at any price or profit level).
Establish your company, product or service dominance with an outstanding .Com brand. For existing brands, it is the ideal opportunity to re-enforce and protect your brand.
Marketability
This is an exciting long term branding opportunity
Historically, exact match keywords have been rated higher in relevancy for search engine ranking. A super-premium .Com domain name from DomainMarket.com comes at a much lower cost and with a higher long-term value than traditional advertising, which is a very risky sunk cost. Organic web traffic is a natural resource that can be acquired by the domain name owner. These domains for sale are great long-term asset investments, with an advertising annuity value to boot.
Ask us about Search Engine Optimization, Search Engine Marketing, and Web Development, with our partner SEO.com ; and VOIP phone services, APIs, and apps with Phone.com.
Respectability
The right domain provides instant authority and perceived market credibility. People associate premium domains with leadership and respect in your market space. This perceived market credibility increases the value of your products and services and drives profits.
Please see Microsoft study, as well as Business Insider and Search Engine Journal for more information on this phenomenon, and how to profit accordingly.
Ten Reasons
10 Reasons to always use DomainMarket.com and tell your friends:
- We are US based, and native English speakers, who provide the best support, and pay all taxes.
- We are available 24x7x365 to provide you with the world's best .Com domain names and customer services, through easy search and commerce interfaces, or by telephone or email.
- We quickly and professionally transfer the names to your account at GoDaddy, Tucows, Enom, Network Solutions, Web.com, or any other registrar that you prefer. You will receive everything you need to maintain control of your new asset right away.
- Review our great case studies, references, and testimonials.
- Our team has successfully completed more premium domain name transactions than any other group, in bulk and individually.
- We invented the expression "premium domains", "domain investing" and "domain secondary market" a long time ago. See this 2003 article.
- We are credited with an early domain search patent, copied and licensed by all major registrars (NameMedia owns since 2005 (now GoDaddy owns)).
- Using .Com domains, web sites and email addresses with exact match keywords is prestigious.
- Using .Com web domains that include contextual keywords get better results from Google, Facebook, and other search apps.
- Using a .Com domain with properly targeted embedded keywords for your web site is a proven method to convert more leads into paying customers than sites without.
Thank you for considering working with DomainMarket.com and SEO.com. We look forward to doing business with you!